I’ve written previously about DPI-awareness in the Windows Presentation Foundation and how to specify measurements in pixels rather than Device Independent Units (DIUs). Something else to consider is image scaling – unlike the Windows Ribbon control or WinRT, WPF has no in-built mechanism for displaying different images according to the system’s DPI setting. This is a nuisance.
To illustrate the problem, I created 5 images. Left-to-right, the image DPIs (vertical and horizontal) are: 72, 96, 120, 144 and 192. The image dimensions are: 32x32px, 32x32px, 40x40px, 48x48px and 64x64px. I purposely used single-pixel-wide lines to make any stretching obvious.

Read on to see what WPF does with these images.
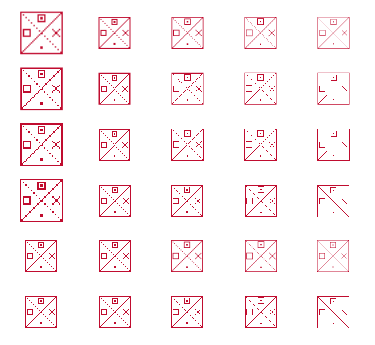
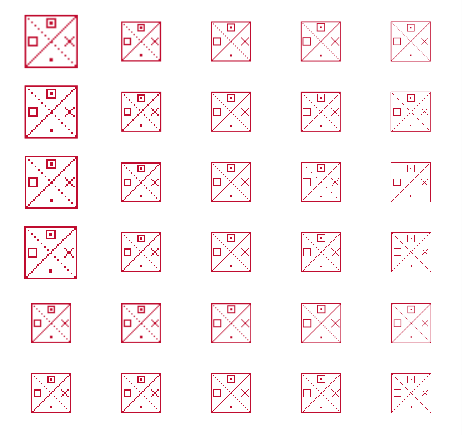
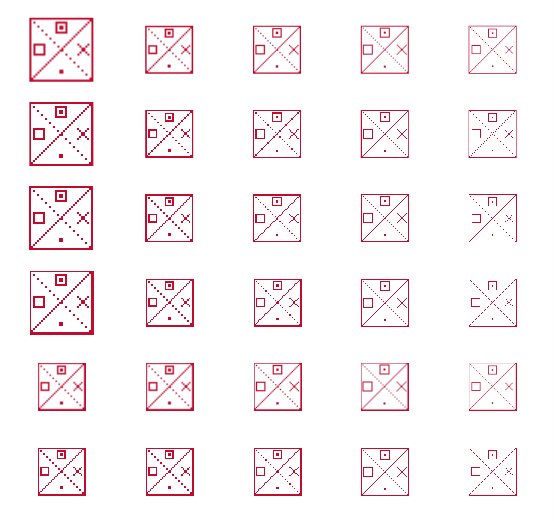
I created a simple application to display these images while varying certain properties. I present here screenshots of the application running at 96 DPI, 120 DPI, 144 DPI and 192 DPI.
The code for the first row of images is:
|
1 |
<Image Stretch="None" … /> |
The code for the second row of images is:
|
1 |
<Image Stretch="None" RenderOptions.BitmapScalingMode="NearestNeighbour" … /> |
The code for the third row of images is:
|
1 |
<Image Stretch="None" RenderOptions.BitmapScalingMode="NearestNeighbour" SnapsToDevicePixels="True" … /> |
The code for the fourth row of images is:
|
1 |
<Image Stretch="None" RenderOptions.BitmapScalingMode="NearestNeighbour" SnapsToDevicePixels="True" UseLayoutRounding="True" … /> |
The code for the fifth row of images is:
|
1 |
<Image Stretch="Uniform" SnapsToDevicePixels="True" UseLayoutRounding="True" Width="32" Height="32" … /> |
The code for the sixth row of images is:
|
1 |
<Image Stretch="Uniform" RenderOptions.BitmapScalingMode="NearestNeighbour" SnapsToDevicePixels="True" UseLayoutRounding="True" Width="32" Height="32" … /> |
96 DPI
120 DPI
144 DPI
192 DPI
Discussion
If you want pixel-perfect bitmap images in your WPF application, the two important properties are ‘UseLayoutRounding’ and ‘SnapsToDevicePixels’. I recommend setting both of these to ‘true’ on your Window; you can disable them for specific child elements if necessary. RenderOptions.BitmapScalingMode can be set to ‘NearestNeighbour’ when you have an image designed for the current DPI. If no such image is available, you should set it to one of LowQuality, Linear (the default), HighQuality or Fant for a better result when scaling is necessary.
Notice that when the width and height is not set explicitly, the 72 DPI 32x32px image is scaled to about 43x43px when running at 96 DPI. Be careful with tools like PNGOUT (and the great Windows GUI PNGGauntlet), as they will strip out DPI/PPI information, causing WPF to scale your images when you’d not expect it to.
In the next part, I’ll describe my solution to displaying different images at different DPIs.


