Image Background Remover Tool

View source on GitHub.

Inspired by Window Clippings, my preferred screenshot tool (which unfortunately crashes a lot under Windows 8 RTM), I wrote a small program for making image backgrounds transparent.

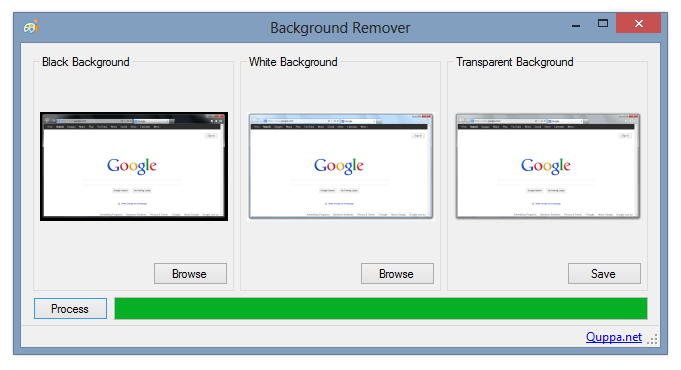
Screenshot of Background Remover

It comes with a command-line interface and a basic GUI (pictured above). The GUI supports dragging-and-dropping images, and you can switch the black and white images by right-clicking on either. The source code is included, along with a sample set of images.

The command-line syntax is: BackgroundRemover.exe imageout imageblack imagewhite

Thanks are owed to Ian Griffiths for the equations used to calculate transparency.

BackgroundRemover.7z
478,473 bytes; SHA-1: 002CF9C89B918951BBC7DECB9F9C1A8D53008E1F

Facebook Messenger for Windows is not just for Windows 7

Facebook recently launched ‘Messenger for Windows’, a desktop client for Facebook chat.

The Messenger for Windows help page suggests that the program requires Windows 7:

What kind of computer operating system do I need in order to use Messenger for Windows?
You can set up the app if you use Windows 7 on your computer.

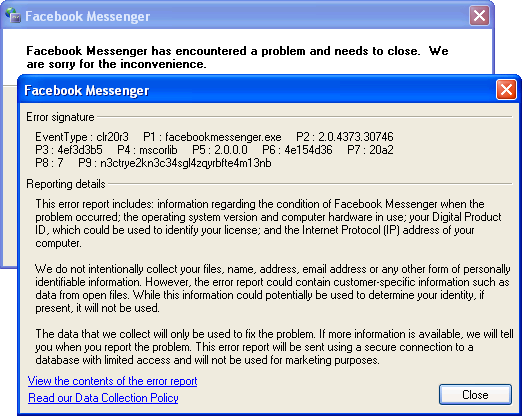
In fact, it runs perfectly well under Windows Vista with the .NET Framework installed. In Windows XP, it crashes on load (though the notification area icon appears first):

Screenshot of Facebook Messenger for Windows (XP)

Looking at the executable in .NET Reflector, the program uses the functions DwmSetWindowAttribute and DwmExtendFrameIntoClientArea, which are not available in Windows XP. I suspect that adding support for that operating system wouldn’t be very difficult, however, as the program is little more than a couple of WebBrowser controls (the heavy lifting is not done on the client side).

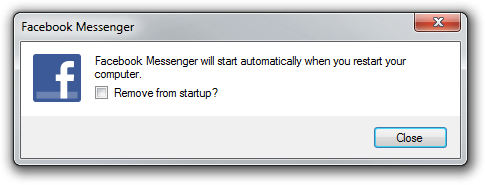
Given that Facebook decided not to support Windows XP, the least they could do is use a task dialog instead of this:

Screenshot of Facebook Messenger for Windows dialog

If you look closely, you’ll notice that the font is Microsoft Sans Serif, not Segoe UI (the latter is the user interface font in Windows Vista and newer – MS Sans Serif hasn’t been the default since Windows ME!). This is largely Microsoft’s fault – MS Sans Serif is the default font in the Windows Forms designer even in Visual Studio 2010 (and the issue has been around for a long time) – but it’s something that the Facebook developers should have picked up on.

I was disappointed to see that the application is installed to the ‘local application data’ folder (C:Users<User>AppDataLocal in Vista and newer) instead of Program Files. I guess when Google decides it’s acceptable to install Google Chrome in %appdata%, everything is permitted. (Microsoft itself is hardly blameless – ClickOnce applications are installed to somewhere non-standard.)

Interestingly, the developers chose to use the CS_DROPSHADOW window class style to draw a shadow around the window even when the DWM is disabled. Given that Google returns fewer than 10,000 results for CS_DROPSHADOW, this must be one of very few applications to use that feature.

(As the screenshot below demonstrates, running the program with IE7 installed produces hilarious results.)

Screenshot of Facebook Messenger for Windows (Vista)

The program doesn’t respect the operating system’s language settings – the notification area icon’s menu is displayed in the language that the user selects on Facebook.

Finally, the docking functionality is implemented by using an application desktop toolkbar (appbar). I haven’t seen many programs use appbars, so it’s neat to see one in action.

When should a program’s UI animations be disabled?

Modern frameworks like the Windows Presentation Foundation, its relative Silverlight and the upcoming Windows Runtime make it easy to add animations to a program’s graphical user interface. When implemented well, animations subtly improve the user experience and can demonstrate a high level of polish in your application. The Zune client software and Windows Live Messenger both feature beautiful animations – coincidentally, both were written with internal Microsoft frameworks (Iris and ‘DirectUI’, respectively; the second is apparently unrelated to anything in WinRT). The Twitter client MetroTwit shows what can be done in WPF (its interface was inspired by the Zune software and the Metro design language).

There are times, however, when animations may become detrimental to the user experience. Animations may appear choppy on lower-end or older systems (especially with heavy frameworks like WPF), and in general they should be disabled entirely for Remote Desktop Connection sessions (only very fast networks with low latency may be able to handle them). Jossef Goldberg from the Visual Studio team has written about the efforts made to bring the performance of Visual Studio 2010 over remote connections up to par, and while his advice is mainly about WPF, the same principles apply to other frameworks, also.

So, how can we decide whether animations should be disabled or not? The answer will likely vary from project to project, but there are a few things that we can do:

1. Check if the program is running in a remote session

In Win32, use the GetSystemMetrics function to get the SM_REMOTESESSION metric (a non-zero result means it is a remote session). In WPF, use the SystemParameters.IsRemoteSession property in the System.Windows namespace. In Windows Forms, use the SystemInformation.TerminalServerSession property in the System.Windows.Forms namespace.

2. Check if animations are enabled in Windows

Windows Vista introduced many new animations to common controls like buttons (notice the smooth glow effect and compare it to the binary states found in Windows XP). Regrettably this change made most owner-drawn implementations look shoddy since they mostly lack animation (e.g. buttons in Firefox), but that’s a topic for another post.

Anyway, these animations can be switched off in the following dialog (aside: the list box was mercifully increased in size in Windows 7, though the window still isn’t resizable):Performance Options Screenshot
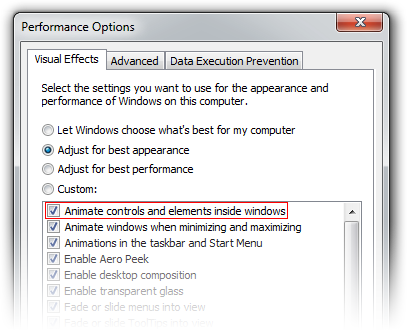
If the user has disabled animations here, it’s probably a good idea to respect that choice in any program you write. We can use the SystemParametersInfo function with the SPI_GETCLIENTAREAANIMATION parameter to check the system setting (or use the SystemParameters.ClientAreaAnimation property in the System.Windows namespace, but note that this always returns true in Windows XP). This only applies to Windows Vista and later.

3. WPF-only: Check the graphics rendering tier

The RenderCapability.Tier property in the System.Windows.Media namespace gives an indication of the graphical capabilities of the system. There are currently 3 tiers, and while the exact meaning may change between .NET releases (as it did in .NET 4.0), this property can be used to help determine what animations, if any, should be enabled.

4. Ask the user!

It can’t hurt to give the user a choice about animations. The remote session checks described above will work for RDP, but there are other technologies available, and we don’t want to punish VNC users by invalidating the entire window 60 times per second for some fancy animation, even if we can’t tell that they’re connecting remotely. If exposing such an option in the UI doesn’t make sense, at least offer it as a command line switch.

Addendum (2011-11-20)

Snooping around PresentationFramework.Aero.dll in .NET Reflector, I happened to come across the ‘Animates’ property in the ButtonChrome class (Microsoft.Windows.Themes namespace):

Similar properties can be found in the other *Chrome classes. Checking the computer’s power status isn’t something covered in this article, but it’s certainly a good idea.
Small Icon Size & DPI in Windows

The GetSystemMetrics function in Windows retrieves system metrics and configuration settings. One such metric is the recommended size (width and height) of ‘small icons’:

Small icons typically appear in window captions and in small icon view.

Another place where small icons show up is the notification area.

MSDN contains a guide to Creating DPI-Aware Applications. It notes the challenge posed by raster graphics and different DPIs. Unlike vector graphics, which can scale without a loss in quality, distinct raster images must be created for different resolutions in order to avoid unpleasant scaling artefacts. (In fact, this is perhaps overstating the benefits of vector graphics: the level of detail suitable for a high-resolution image is not necessarily suitable for a low-resolution image, so using the same vector for all sizes doesn’t always make sense.) Windows icons, as of Windows 7, contain only raster graphics.

Small Icon Sizes

The small icon size varies according to the system DPI and OS version:

DPI Setting Windows 7, XP Windows Vista
96 (Default, 100%) 16×16 16×16
120 (125%) 20×20 22×22
144 (150%) 24×24 26×26
192 (200%) 32×32 36×36

The sizes for Windows Vista (apart from the size at 96 DPI) don’t make much sense – they don’t match up with the DPI scaling ratio. It is possible that this was a mistake, hence the change in Windows 7.

So, if you want to make sure your small icon (e.g. notify icon) looks beautiful under the widest possible range of systems, you should ideally include the images with the sizes 16×16, 20×20, 22×22, 24×24, 26×26, 32×32 and 36×36. If that sounds like a lot of work (it shouldn’t be with a high quality tool like Axialis IconWorkshop), Microsoft’s own recommendation is to include 16×16 and 32×32 pixel icons. Keep in mind, though, that scaling either of those sizes to 20×20 or 22×22 pixels can result in a rather awful-looking icon. While it is still rare to see anything but the default setting of 96 DPI, this will not be the case forever.

WinForms Icon Sizes

When using the System.Drawing.Icon class, it is a good idea to use one of the constructors that takes the icon size as a parameter.

Windows Forms conveniently exposes a property called SmallIconSize in the SystemInformation class. This property gives us a System.Drawing.Size corresponding to values listed above, which we can put straight into our icon constructor:

The equivalent properties in WPF are SystemParameters.SmallIconWidth and SystemParameters.SmallIconHeight.

Both WPF and WinForms wrap around the Win32 GetSystemMetrics function taking the arguments SM_CXSMICON (small icon width) and SM_CYSMICON (small icon height).

Windows 7-style Notification Area Applications in WPF: Part 4 (Multiple Monitors)

View source on GitHub.

At the end of Part 3 in this series, I noted that the window positioning logic depends on accurately getting the bounds of the monitor where the notify icon is located. Specifically, we require the bounds of the working area (the space on the monitor excluding the taskbar and other docked items). WPF gives us the System.Windows.SystemParameters.WorkArea property, but this gives us the area of the primary display monitor’s working area, and the taskbar (and thus notify icon) might be located on a different monitor. Unfortunately, support for accessing information about anything other than the primary monitor with the SystemParameters class seems to be absent as of .NET 4.0.

We could use the System.Windows.Forms.Screen class to easily solve this problem: the System.Windows.Forms.Screen.GetWorkingArea method has an overload for finding the working area of the monitor that contains a given rectangle, which is exactly what we need to do. However, I am going to opt to use Win32, instead, simply to avoid depending on WinForms (yes, I realise that sounds a bit strange given that this project revolves around a System.Windows.Forms.NotifyIcon). In any case, there is something to be said for knowing what it is that all these .NET functions wrap around 🙂

The two functions we’ll use are MonitorFromRect (to find the handle of the monitor containing the notify icon) and GetMonitorInfo (to get the working area of that monitor).

Continue reading “Windows 7-style Notification Area Applications in WPF: Part 4 (Multiple Monitors)”

Windows 7-style Notification Area Applications in WPF: Part 3 (Taskbar Position)

View source on GitHub.

In the previous post in this series, I showed how to find the location of a notify icon by implementing the new Windows 7 Shell32.dll function Shell_NotifyIconGetRect in managed code for use with the System.Windows.Forms.NotifyIcon class.

In this post, I will look at how to accurately position a window above (or adjacent to) a notify icon, no matter the location of the taskbar (barring a certain issue that I note at the end of this post :)). As I noted in Part 2, the current version of Keiki is hardcoded to appear in the bottom right-hand corner of the user’s screen, making it very out of place when the taskbar is moved to the top/right/left of the screen. We’ll need to delve into the Win32 API once again, but as in Part 2 the amount of code required is not daunting, even for a Win32 beginner like me.

Continue reading “Windows 7-style Notification Area Applications in WPF: Part 3 (Taskbar Position)”

Windows 7-style Notification Area Applications in WPF: Part 2 (Notify Icon Position)

View source on GitHub.

You may have noticed that the notification area applications in Windows 7 (Volume/Power/Network/Action Centre) appear centred above their icon. I wanted Keiki to do the same; the current version is hardcoded to sit in the bottom right of the screen, which causes a few problems:

  1. The taskbar position is not taken into account; the window will be in the bottom right even if the taskbar is at the top of the screen.
  2. The window appears on top of the new Windows 7 fly-out interface for hiding notify icons if the Keiki icon is kept there.

In this post, I will demonstrate how to retrieve the location of a System.Windows.Forms.NotifyIcon with a function new to shell32.dll in Windows 7: Shell_NotifyIconGetRect. Windows Vista unfortunately lacks this function: I will cover the approach I use in Vista in a later post.

Thanks to Frédéric Hamidi for pointing me in the right direction.

Continue reading “Windows 7-style Notification Area Applications in WPF: Part 2 (Notify Icon Position)”